First of all, we're going to need some things:
- Red or blue acrylic paint (spraypaint should also work fine)
- A paint brush
- Scissors
- Spray-on glaze (or rubber cement)
- Keyholders
- A few open chainmail links.
Not pictured above is two pairs of pliers, craft glue and a power drill.
Next up you'll need some bottlecaps. If you care what kind of beer I drink, you're doing it wrong.
Next is to drill a hole in the side of the caps.
Be careful when you're drilling through the caps. I recommend doing it on a wooden surface that you don't mind having a couple holes in.
Clamping them to something would be a great idea, but I just tossed on some leather work gloves and held them in place while I drilled.
 Sorry for the blurry picture, but that's about where you want the hole.
If you're wondering, that piece of wood is my mandril, "Old Failey." We made him without measuring saw cuts or where to screw. You'll see more of him in any chainmail tutorials I do in the the future.
Now to paint. This isn't a particularly artistic step, so just slap the paint on, wait for it to dry and then slap on some more. Depending on the base colour your bottle cap is you might need only one, two or even three applications of paint.
When I started this project, I had intended to create a "Nuka-Cola" stencil to paint onto the caps with, but the details proved to be too diminutive and I gave up on that idea.
Luckily, a Mr. Chris Furniss from Weekly Geek Show was kind enough to make a sheet of nuka cap graphics that can be printed and cut out here.
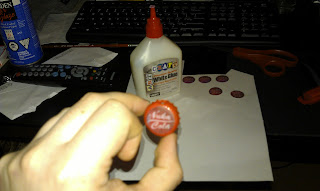
Cut out the picture, glue the backside,
and slap it on the cap.
Try and work any excess glue out from between the paper and cap.
Also be sure to align the paper with the hole in the cap. The first one I made I didn't bother to line it up, thinking that it wouldn't make much of a difference in aesthetics, but it really does.
For that worn out "I survived the nuclear holocaust" look, this is where you'll want to burn, scratch, file and cut the cap.
When making mine I did about 60% clean and the rest "weathered."
Time to go outside! If you're doing this in the winter time and live somewhere that commonly has temperatures lower that -30c, I recommend not doing this in your pajamas like I did. I know we're supposed to be Manly Men, but you'll scare your neighbors.
Again, do this outside. The can instructions said in a warm, well ventillated room, but even outside the fumes had me a bit dizzy.
While spraying, don't drown them. Doing two light coats is better than getting air bubbles. Make sure to get the sides. Once you're done spraying, bring them back inside.
This stuff is pretty amazing at keeping everything sealed in. It's my new favourite tool.
All that's left to do is let them dry and attach the keychains.
I got my keyholders at Michaels craft store. The box of 28 pieces only cost me $4.50.
I used galvanized steel rings to attach the holder to the cap, since I had some laying around the house.
And that's it. You've got yourself a Nuka-Cola bottle cap keychain.
I've seen others turn them into earrings, bracelets and necklaces, but I think I'll leave that tutorial to Girly Projects For Girly Girls.
Thanks for reading. I hope some of you give this a try.


No comments:
Post a Comment